This tutorial will guide you through the process of connecting your MetaMask wallet to Cherry EVM.
If you do not already have MetaMask installed, you can install the extension from the Chrome Store. Follow the Getting Started with MetaMask guide from the official MetaMask documentation. Once you have the MetaMask extension, follow the account creation wizard. Store your mnemonic safely, and do not share it with anyone.
Connect to Cherry EVM
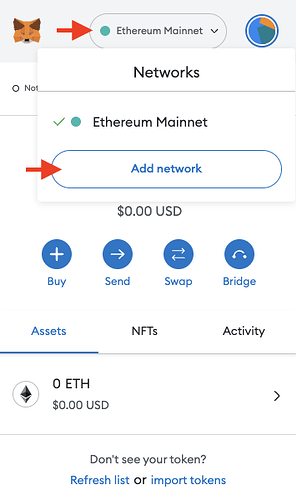
Navigate to the Add Network section of MetaMask. You can find it at the bottom of the list of available networks after clicking on the currently active network.
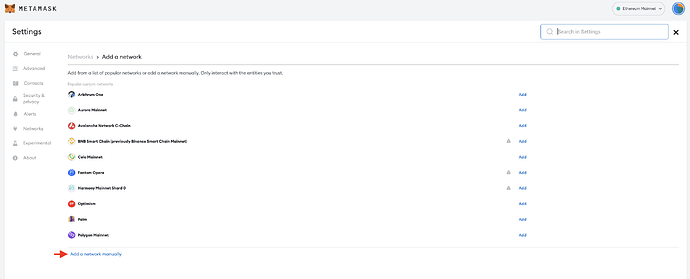
From there, click the Add a network manually button at the bottom of the popular custom networks.
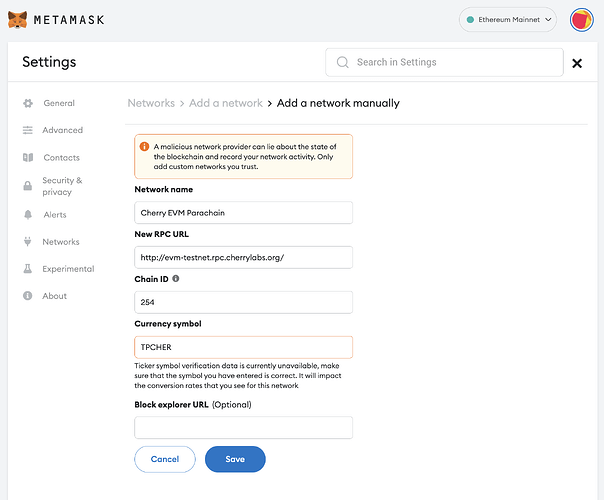
This should open up a form to add a new network to your MetaMask (you might have to unlock MetaMask before it opens). Fill in the network details described in our documentation for either mainnet or testnet networks and click “Save.”
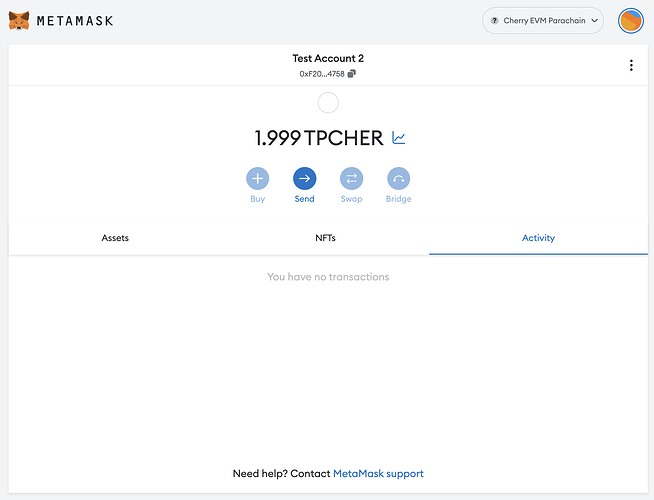
Cherry EVM should now be connected, and you should see your pCHER balance (if you have any).
You will have to find your Substrate proxy account linked to your MetaMask address to see your balance and be able to transfer balances to it. Learn how here: Ethereum - Substrate Account Mapping


